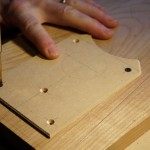
Today I drilled tweeter and upper midrange mounting holes on the first baffle. A character-building experience…
To ensure the best alignment I decided to drill the tweeter holes with the appropriate tweeter baffles screwed in place; I reckoned the easily drilled hardboard would also steady the Forstner bit as it started to attack the cherry.
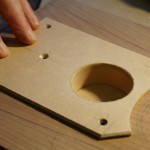
This ploy worked pretty well, but after the first hole I realised that once the hardboard cut was established it was better to then remove the tweeter baffles to avoid their holes from fraying. The first tweeter baffle hole was somewhat furry therefore, however this will be hidden under the tweeter flange so not a concern. Two clean hardboard tweeter holes… So far so good.
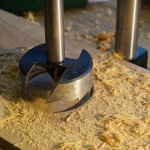
The fun started with the large 3.25″ bit I had purchased months earlier with the tweeter bit. Using my Bosch drill’s slowest speed setting (around 300rpm which for hardwood is admittedly faster than ideal) the initial circumferential cut was nice and clean. However the central cutters made virtually no impression on the wood between centre and circumference.
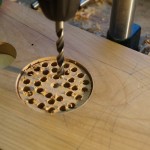
Increased pressure via the drill press was limited by stalling the drill, the drill lifting out of its mounting, or both, and despite regular pauses to lift and rest the bit progress was very slow. It was also accompanied by a fair amount of smoke, firstly from the wood surface, and secondly from the drill! Rethink required.
Clearly the large Forstner was not up to the task, and to be fair neither were my relatively light weight drill and press. Not being prepared to part with big money for a Colt bit I will only ever use twice, I initially honeycomb drilled the waste prior to a further assault.
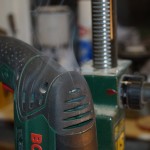
These modifications produced better progress – although I chewed the hole edge in a moment’ s loss of concentration I reached a depth of around 15mm before the incendiary risk broke my nerve. I used the jigsaw to remove the remaining disc of waste befor returning to my trusty drum sander to finish off. End result… acceptable – some further loss of pride re workmanship, but in the end no-one will know – the midrange unit will conceal the tatty edge.
Thinking about this “learning experience” whilst consuming a Franco Manca sourdough pizza, I have decided on the following strategy for baffle two:-
- Drill through-hole at centre
- Honeycomb-drill waste to within an inch of its life
- Perform initial circumferential cuts from BOTH sides with Forstner
- Proceed if bit decides to cut; otherwise remove waste with jigsaw and finish with drum sander
Esperons…